Apple, ginger and leather recipe

Apple, ginger and leather recipe
These homemade fruit skins are the perfect snack for hiking, camping trips, ski trips or road trips. In this post we will guide you how to make fruit skin using an oven or dryer!
This recipe was created in collaboration with Eddie Bauer.
We love making fruit peels, whether they’re in a dryer or oven. It’s easy to make, open to lots of personal customization, and a lot of fun to eat. In theory, these fruit skins can be stored for a few months, but in practice they are so good that they usually disappear in a few days.
For this particular recipe, we’re using apple, ginger, and maple syrup, which we think have a certain warm vibe that works perfectly with cold weather. Another added benefit of fruit skins is that they will remain soft and crunchy, even in cooler temperatures. This makes it the perfect snack for winter hikes and ski trips.
So if you’re excited to start making your own fruit skins, we’ve got everything you need to know below. We share instructions for preparing it either in a dryer or in a home oven.
Why we love them:
- Lots of fun to make and eat.
- Perfect for cold weather hikes, as it doesn’t freeze into small, solid clumps like most power bars.
- Lots of customizing flavour.
Ingredients
Apple: You can use any kind of apple you want. We prefer Pink Ladies because they are a good balance of sweet and sour, but Fuji, Honey Potatoes, and Jazz are also good choices.
Ginger : The unique flavor of fresh ginger really complements the apple in this recipe.
Maple syrup: We love the combination of apple and maple syrup flavors, which is why we use it as a sweetener. But you can use an equivalent amount of agave, honey, or granulated sugar if you prefer.
Lemon juice: The citric acid in lemon juice enhances the flavor of all the other ingredients without overpowering them.
Basic equipment
Dryer (or oven): While you can make fruit skins in a home dryer or oven, we prefer using a dryer because it allows us to set the temperature. Our favorite dehydrator for fruit skins is Brod & Taylor’s SAHARA, which has shelves large enough for a full-size silicone baking pan. If you are looking for a dryer, check out our article on the best dryers.
Blender or Food Processor: We used a high-powered Vitamix blender for this recipe, but any blender or food processor will work. The goal is to turn the fruit into a smooth and consistent puree.
SILICONE BAKING MAT: Silicone baking mats are the best non-stick surface for making fruit skins and make peeling off dried skin very easy.
Spatula: If you make a lot of fruit peels, a spatula is a must. It will help you spread and shape your fruit puree to the perfect thickness and size.
Butter paper: One of the best ways to store fruit skins is to wrap them in parchment paper. The non-stick paper lining prevents the skin of the fruit from sticking, even if it is crushed in its package.
How to make apple and ginger peel – step by step
The first step is to peel, core and cut the apples into approximately 1-inch pieces, then transfer them to a bowl of lemon juice, chopped ginger, and a little water. Simmer the fruit over medium heat for 10 minutes, until the apples are soft.
Once the apples are soft, transfer the mixture to a blender or food processor. Add the maple syrup and whisk until the mixture is completely smooth.
Spread the puree on a baking sheet lined with silicone mat (for the oven) or on a leather fruit tray (for the dryer).
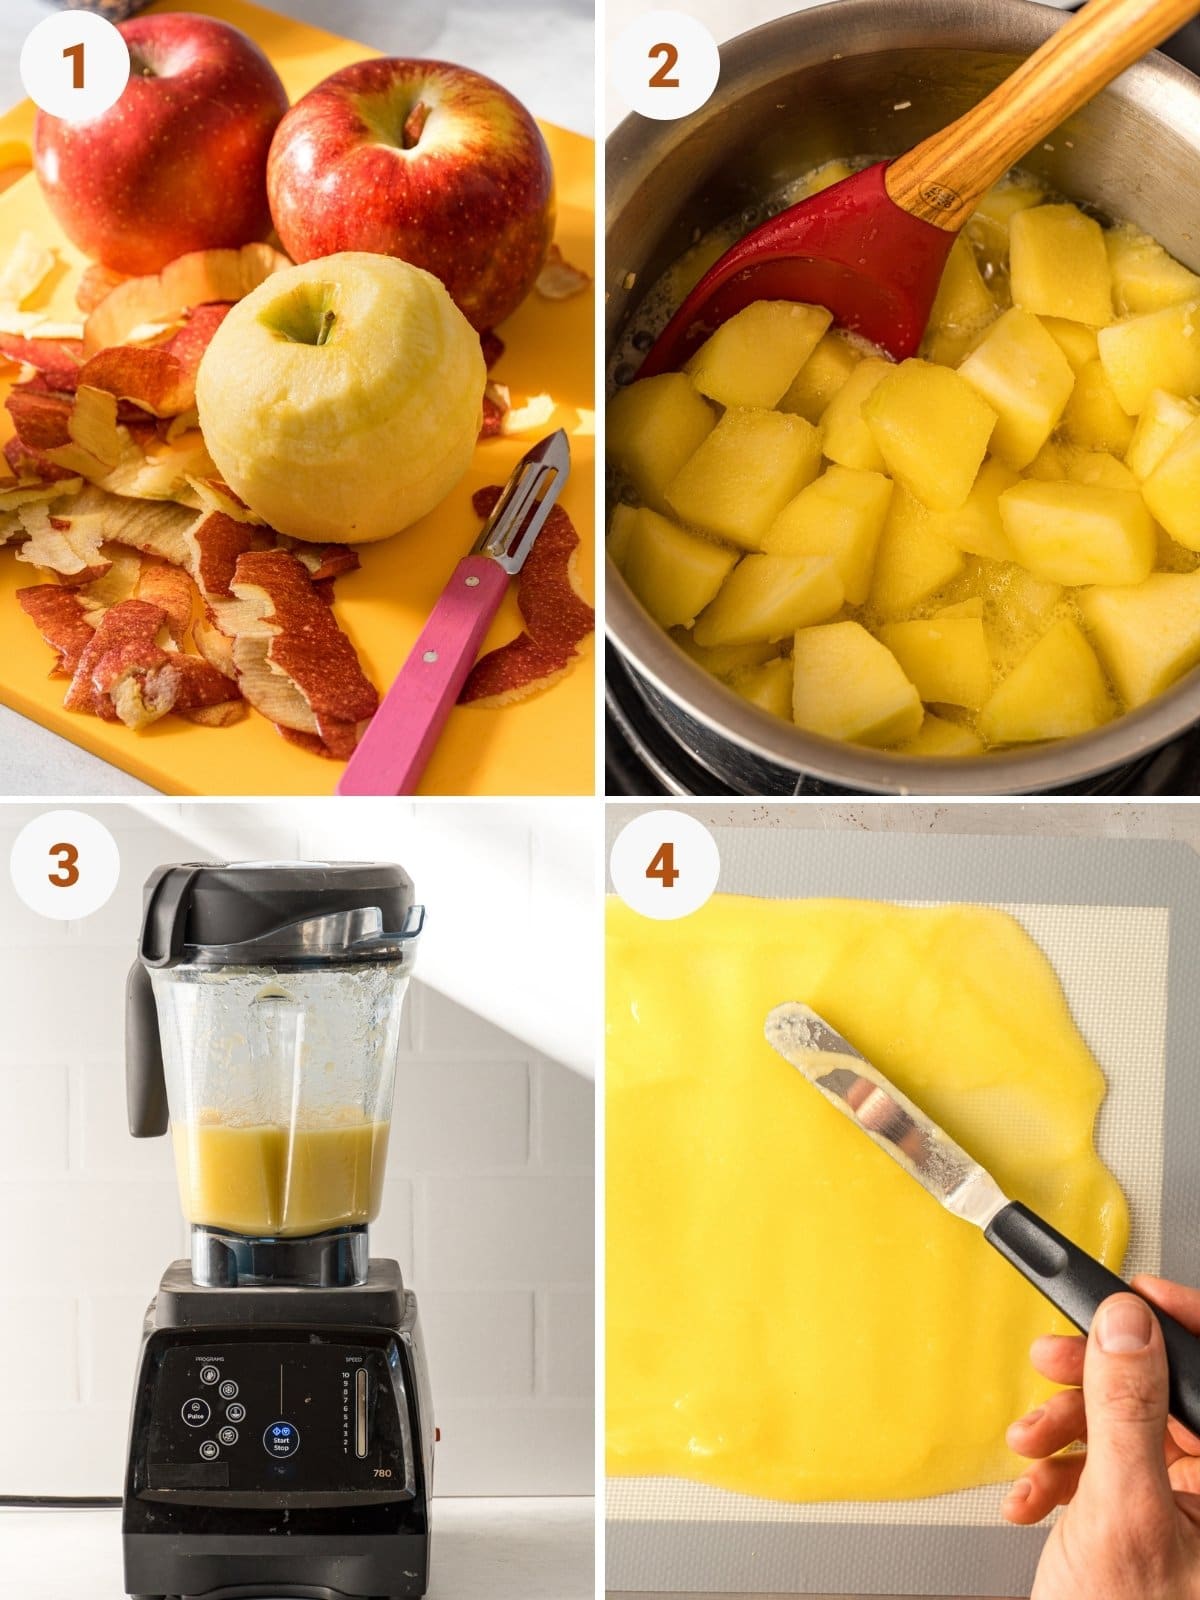
Using an offset spatula, spread the puree until the center is an inch thick and the edges are about an inch thick. The rind of the fruit dries from the outside in, so building thicker edges will ensure that all the fruit rinds dry at the same time.
A good trick to achieve this is to distribute all of the mash as evenly as possible. Then rotate the offset spatula to the edge and use it to gently push the edges into the center. This will allow you to arrange the border lines and create a bit of depth around the edges.
To dry the oven: Place the baking tray in the oven at the lowest temperature the oven can handle. Leave the door open with a wooden spoon to allow moisture to escape (be careful if you have pets or curious children!).
To dry in a dryer: Place the mash in the dryer and set it to 135 degrees Fahrenheit.
Refrigerate for a few hours until the peel of the fruit is not sticky and can be peeled in one piece. The exact times will depend on whether you are using an oven or dryer, the level of humidity in your home, etc. But expect between 3 and 6 hours.

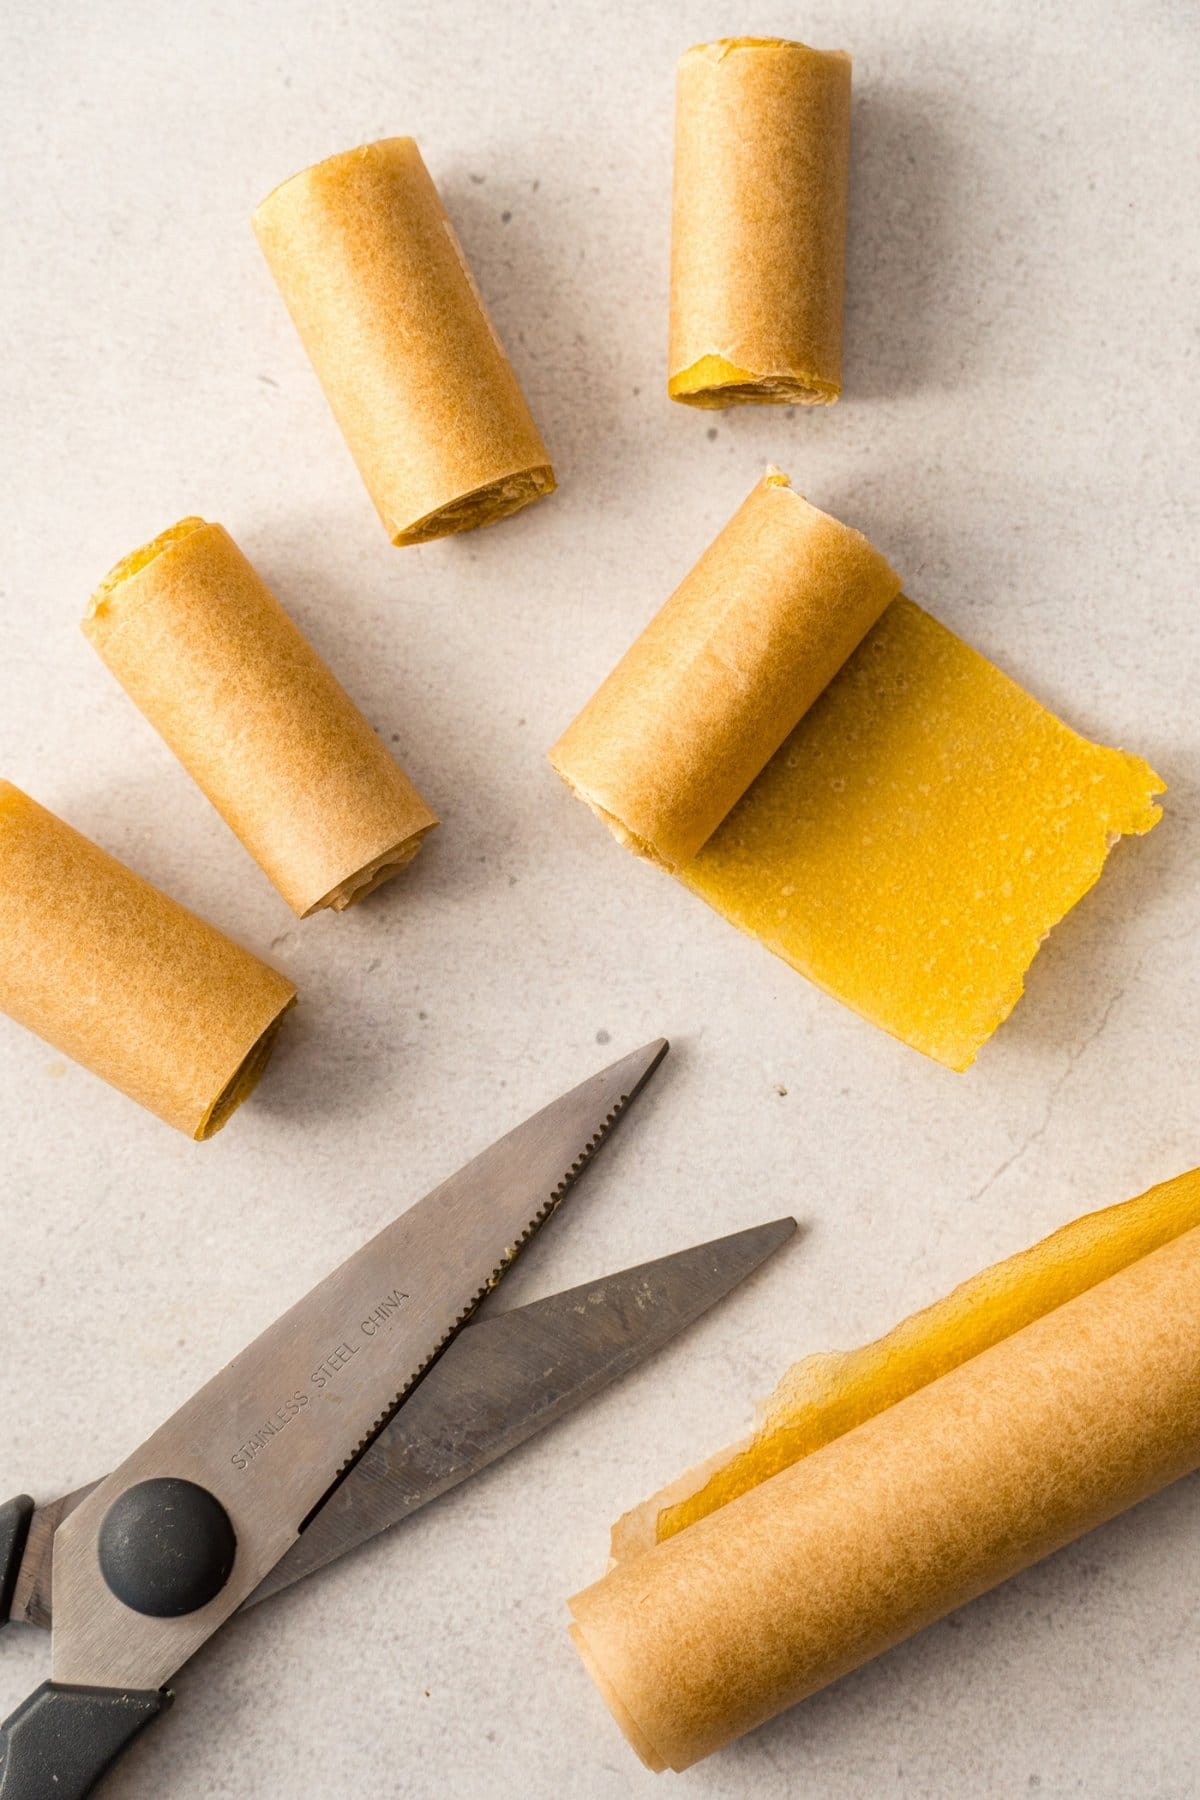
Gently peel the fruit skin off the silicone mat. If there are soft sections in the middle that cause them to break, stop and return them to the oven or dryer to continue drying.
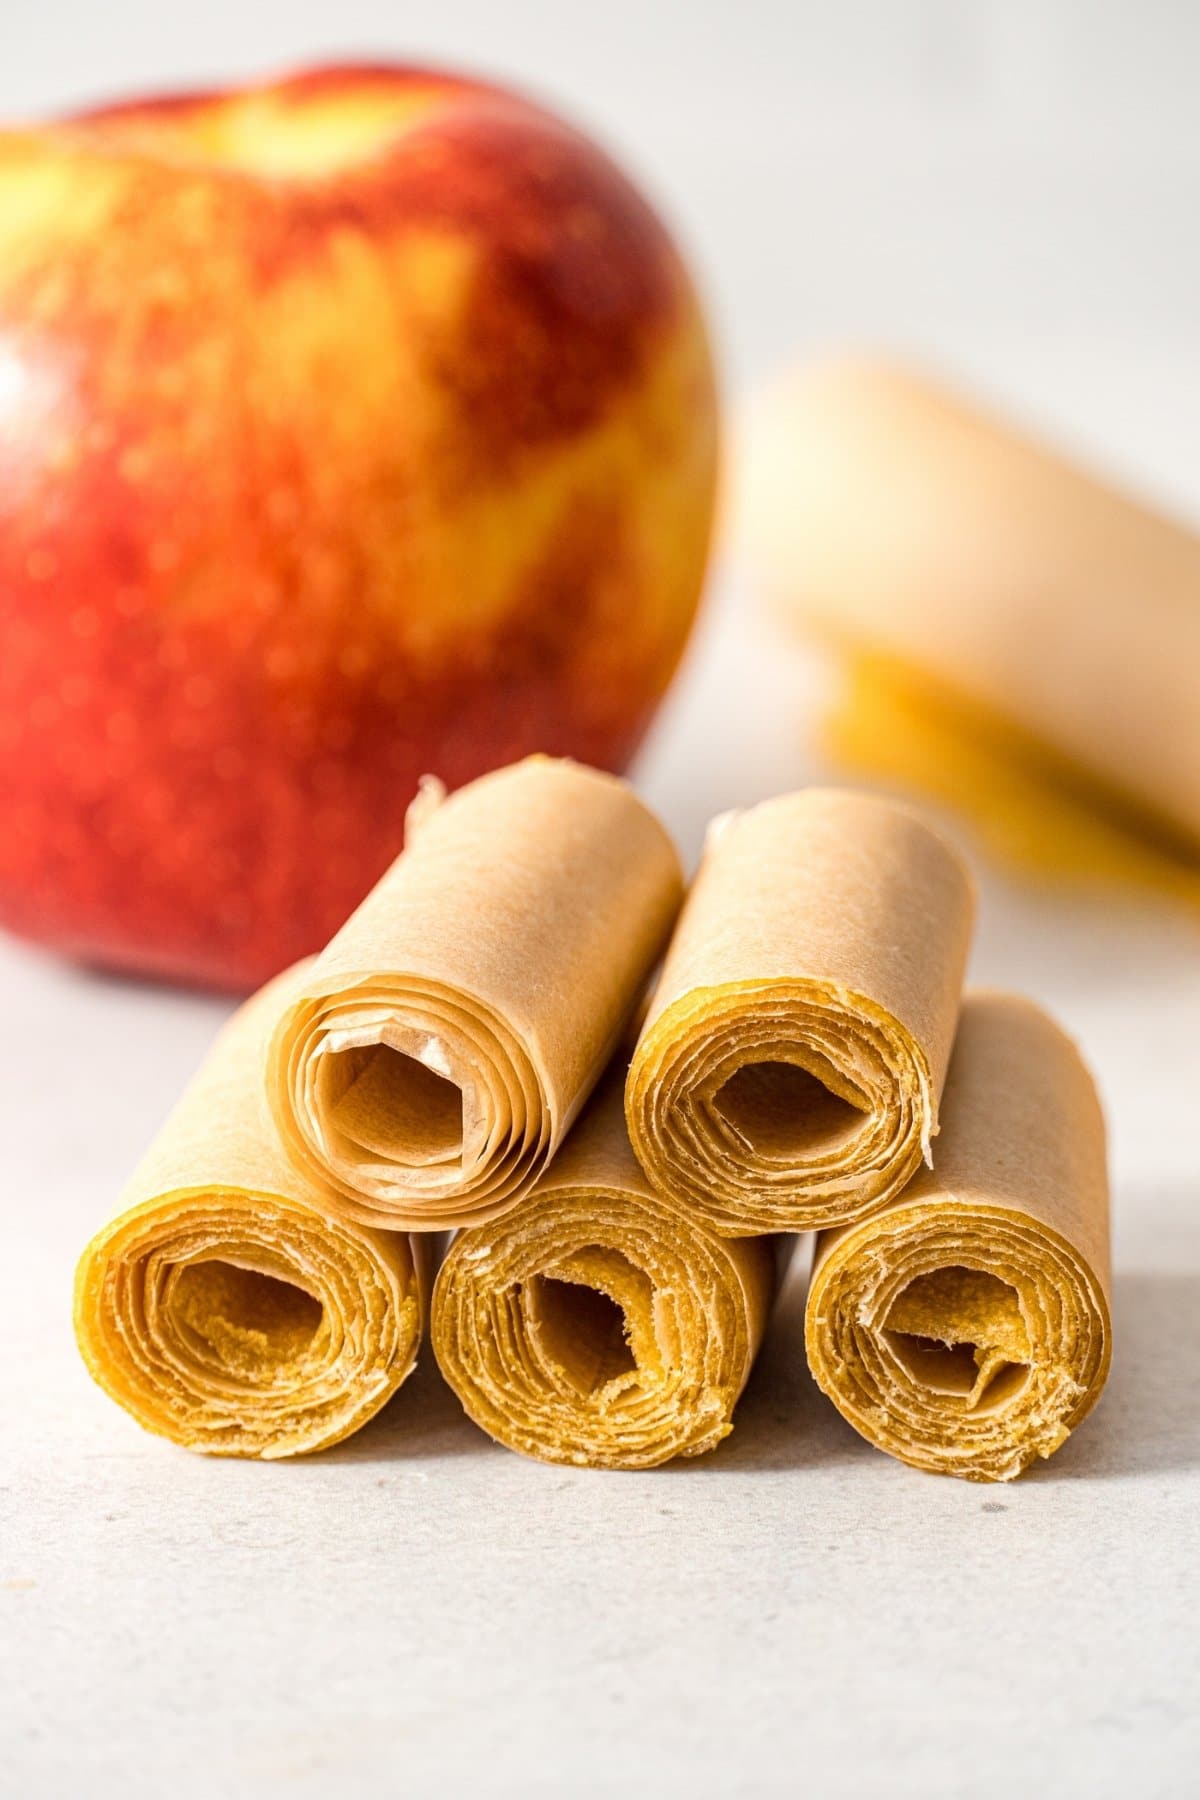
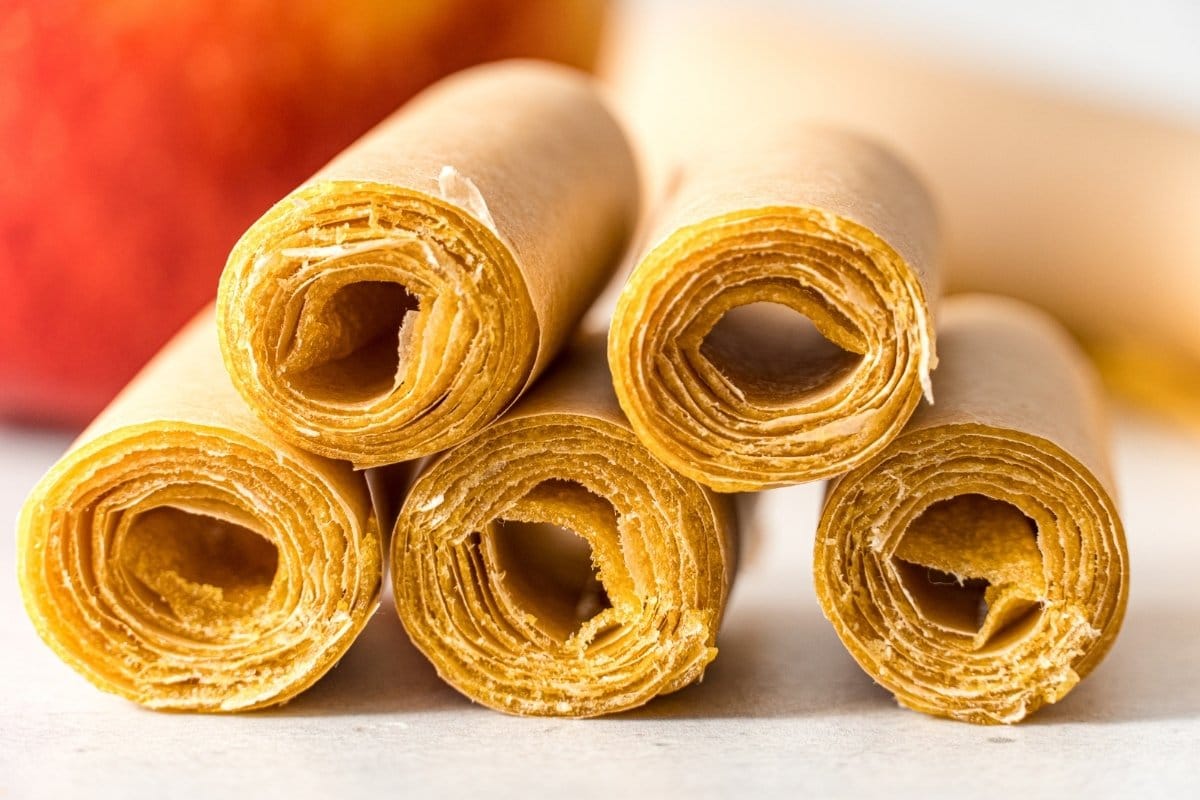
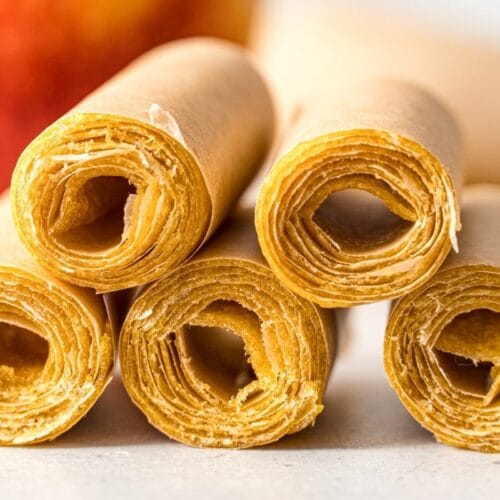
If it dries evenly, it will flake off easily. Then transfer it to a piece of parchment paper, which you may need to cut to size, and roll it up. Using a pair of shears or kitchen shears, cut the roll into snack-size pieces, approximately 1″ to 2″ wide.
How to store fruit peels
For short-term storage of a few weeks, fruit skins will ideally store on the counter if stored in a ziplock bag or resealable container. Excessive exposure to air will start drying them out.
For medium-term storage of a few months, we recommend placing them in a tightly closed mason jar and placing them in a cool, dark place.
For long-term storage of more than a year, we recommend placing it in a vacuum-sealed container and placing it in a cool, dark place.
Top tips for making fruit skin
- Heating the fruit mixture releases more pectin, which helps give the fruit peel a smooth, pliable texture.
- A little lemon juice will enhance the flavor of any fruit peel without making it lemony.
- Use a silicone baking mat! It makes peeling the skin off the finished fruit an absolute breeze.
- An offset spoon makes shaping your own puree of fruit skin very easy.
- Try to make the edges of the fruit’s skin a little thicker than the middle. It will dry from the outside in, so piling more on the edges will help it all finish at the same time.
- Once you spread the mash onto your blade, use the offset spatula to tidy the edges by turning it over the edge and pushing the mash back (like a squeegee).
- Dry it at 135 F in a dryer or as close to the oven as possible. Use a wooden spoon to keep the oven door open and allow air to circulate.
- 4 cups sliced apples
- juice of half a lemon and about 1 tablespoon
- 1 tablespoon minced ginger
- ½ bowl of water
- 2 tablespoons maple syrup , more or less to taste
- Peel, core, and cut the apples into 1-inch pieces and transfer them to a bowl with lemon juice, chopped ginger, and water. Cook over medium heat for 10 minutes, until apples are soft.
- Carefully transfer the apples to a blender or food processor, add the maple syrup and process until completely smooth.
- Spread the puree on a baking sheet or dryer tray. The trick for fruit skins is to grease the purée so that the edges are a little thicker than the middle; It will dry from the outside in, so this helps ensure that everything is finished at the same time.
- To dry the oven: Place the baking tray in the oven at the lowest temperature the oven can handle. Leave the door open with a wooden spoon to allow moisture to escape (be careful if you have pets or curious children!).To dry in a dryer: Place the mash in the dryer and set it to 135 degrees Fahrenheit.
- Refrigerate for a few hours until the peel of the fruit is not sticky and can be peeled in one piece. The exact times will depend on whether you are using an oven or dryer, the level of humidity in your home, etc.
- Transfer the skin to a piece of parchment paper and roll it up. Using scissors, cut them into snack-size pieces.
- Store it in an airtight container or ziplock bag for up to a few weeks.
Serving: 1 1″ x 12 pieces | Calories: 22 calories | Carbohydrates: 6 g | Potassium: 40 milligrams | Core: 1 g | Sugar: 4 g